Tired of crocheting tiny amigurumi wings only to spend 20 frustrating minutes trying to sew them evenly onto your bee’s back? This free no-sew crochet bee pattern uses a clever Front-Loop petal stitch in Round 8 so both wings sprout directly out of the body as you crochet—100% zero sewing required!
Whether you want a palm-sized desk buddy worked in classic Worsted (#4) cotton/acrylic yarn or a giant, squishy pillow-bee worked in Super Bulky (#6) plush chenille yarn, this no-sew crochet bee pattern uses the exact same 14-round stitch count for both!
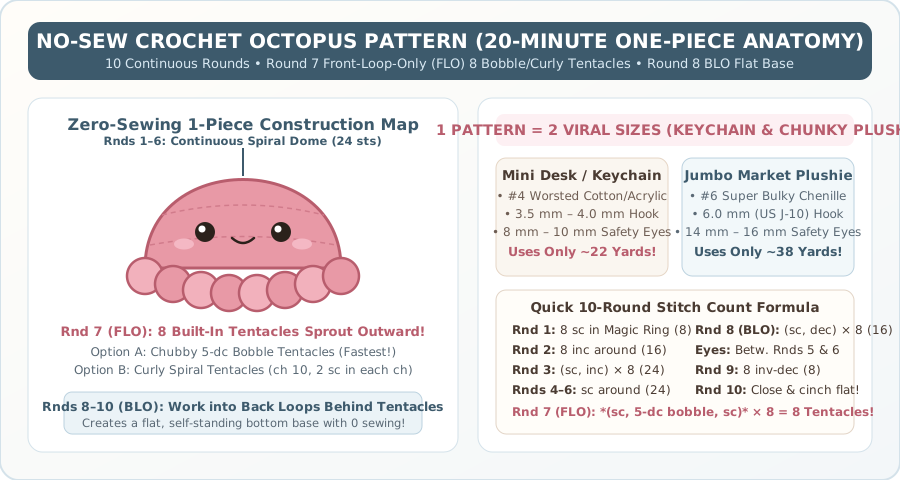
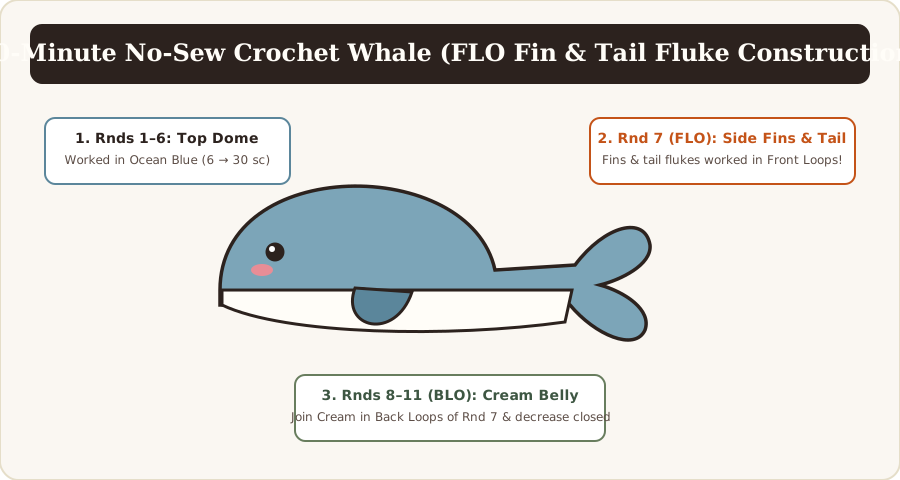
In under 25 minutes, you will learn how to work a seamless pill-shaped body, execute our jogless amigurumi stripe trick (so your brown/black stripes don’t have an ugly stair-step jump on the belly), and pop out two symmetrical wings without ever picking up a sewing needle. (Love zero-sewing plushies? Try our 20-minute No-Sew Crochet Octopus Pattern and No-Sew Crochet Whale Pattern next!)
📋 Dual-Yarn Pattern Specifications (Mini Keychain vs. Chunky Plush Bee)
Because amigurumi scales proportionally with yarn thickness, you can use this single pattern to make three completely different sizes of bumblebees simply by swapping your yarn and hook:
| Bee Size Version | Yarn Weight & Fiber | Recommended Hook | Safety Eye Size | Finished Dimensions | Total Yardage Needed |
|---|---|---|---|---|---|
| 1. Mini Keychain Bee | #3 DK or #4 Worsted Cotton | 3.5 mm (US E-4) | 8 mm eyes | 3.25 in long × 2.25 in wide | ~24 yds total |
| 2. Classic Desk Bee | #4 Worsted Acrylic | 4.0 mm (US G-6) | 10 mm eyes | 4.0 in long × 2.75 in wide | ~30 yds total |
| 3. Jumbo Plush Bee | #6 Super Bulky Chenille | 6.0 mm (US J-10) | 14 mm or 16 mm | 6.5 in long × 4.5 in wide | ~42 yds total |
🧶 Materials & Tools Needed
- Yarn (in your chosen weight from the chart above):
- Color A — Honey Gold / Mustard Yellow (Head, Center Stripe & Tail): ~16 yards (#4) or ~24 yards (#6 Chenille)
- Color B — Dark Espresso Brown or Charcoal Black (2 Body Stripes): ~9 yards (#4) or ~12 yards (#6 Chenille)
- Color C — Warm Cream / White (2 Built-In Wings + Cheek Highlight): ~5 yards (#4) or ~6 yards (#6 Chenille)
- Scrap of Dusty Pink Yarn: 12 inches for embroidering rosy cheeks under the eyes
- Crochet Hook:
3.5 mmfor Worsted Cotton,4.0 mmfor Worsted Acrylic, or6.0 mmfor Super Bulky Chenille (Note: In amigurumi, we always size down 1.0 mm to 1.5 mm from the yarn label’s standard hook recommendation so white stuffing never peeks through the stitches!) - Safety Eyes: 1 pair (8 mm–10 mm for Worsted; 14 mm–16 mm for Chenille) — or black embroidery floss for baby-safe stitched eyes
- Polyester Fiberfill Stuffing: A generous handful (~20g–45g)
- Notions: 1 locking stitch marker (essential for working in continuous spirals!), tapestry needle for burying the final tail, and scissors
🔤 Crochet Abbreviations & Special Stitches (US Terms)
- MR: Magic Ring (adjustable starting loop)
- sc: Single crochet
- inc: Single crochet increase (work 2 sc into the same stitch)
- inv-dec: Invisible single crochet decrease (insert hook into Front Loop Only of next 2 stitches, yarn over, pull through 2 front loops, yarn over, pull through remaining 2 loops on hook)
- dc: Double crochet
- sl st: Slip stitch
- FLO: Front Loop Only (the loop closest to you)
- BLO: Back Loop Only (the loop farthest from you)
- st(s): Stitch(es)
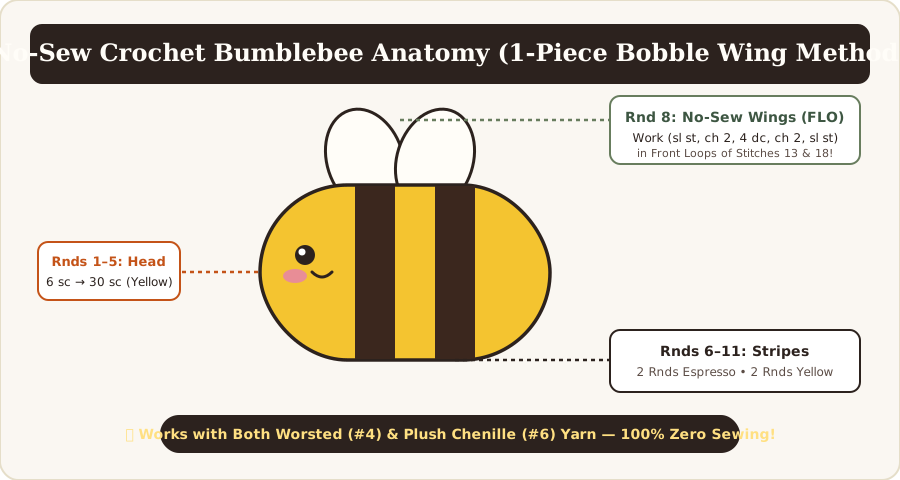
[!TIP] How Does the No-Sew Wing Work? In Round 8, when we reach the top center of the bee’s back (Stitches 13 and 18), we temporarily attach Color C (Cream) into the Front Loop Only (FLO) and work a tall petal fan:
(sl st, ch 2, 4 dc, ch 2, sl st)all inside that single front loop! Then, in Round 9, we work our normal body stitches into the unworked Back Loop Only (BLO) right behind the wing, locking the wing upright forever with zero sewing!
🐝 Step-by-Step No-Sew Crochet Bee Pattern
Pattern Note: This bee is worked in continuous spirals from the front of the face to the back stinger tail without joining at the end of each round. Move your locking stitch marker into the 1st stitch of every round to track your place.
Phase 1: The Honey-Yellow Face & Head (Rounds 1 – 5)
Start with Color A (Honey Yellow).
- Round 1: Make a magic ring and work 6 sc into the ring. Pull tail tight to close. (6 sts).
- Chenille Yarn Tip: If your plush chenille yarn snaps when pulling a magic ring shut, instead Chain 2 and work 6 sc into the 2nd chain from your hook!
- Round 2: Work
*inc*(2 sc) in each stitch around. (12 sts). - Round 3: Repeat
*1 sc in next st, inc in next st*6 times around. (18 sts). - Round 4: Repeat
*1 sc in next 2 sts, inc in next st*6 times around. (24 sts).- Studio Shaping Trick: For a perfectly round face instead of a hexagon, stagger your increases on Round 4 by working:
1 sc, inc, *2 sc, inc* × 5, 1 sc!
- Studio Shaping Trick: For a perfectly round face instead of a hexagon, stagger your increases on Round 4 by working:
- Round 5: Work 1 sc in each stitch around. (24 sts).
- Change to Color B (Espresso Brown) on the final pull-through of the 24th stitch of Round 5! Do not cut Color A (leave it inside the body to pick back up at Round 8).
Phase 2: First Stripe & Built-In No-Sew Wings (Rounds 6 – 9)
With Color B (Espresso Brown):
- Round 6 (Jogless Stripe Start): Work 1 slip stitch (
sl st) into the first stitch, then work 1 sc into each of the remaining 23 stitches around. (24 sts — that single starting slip stitch eliminates the stair-step color jump on the bottom of your bee!). - Round 7: Work 1 sc in each stitch around (including into the starting
sl stof Round 6). (24 sts).- On the final pull-through of the 24th stitch, switch back to Color A (Honey Yellow). Leave Color B attached inside the body for the second stripe.
With Color A (Honey Yellow) — Look closely at the top of your bee so the wings sit squarely on top of the back:
-
Round 8 (The No-Sew Wing Round!):
- With Color A (Yellow), work 1 sc in each of the first 12 stitches.
- Left Wing (in Stitch 13 FLO): Drop Yellow to the back (do not cut!). Insert your hook into the Front Loop Only (FLO) of Stitch 13, pull up a loop of Color C (Warm Cream), and work
(sl st, ch 2, 4 dc, ch 2, sl st)all into that same Front Loop of Stitch 13! Fasten off Cream and tie its two short tails together inside the bee’s body so the wing can never loosen. - Pick up Color A (Yellow) again. Fold the Left Wing forward toward the face, insert your hook into the unworked Back Loop Only (BLO) of Stitch 13, and work 1 sc in Yellow!
- Work 1 sc in both loops of each of the next 4 stitches (Stitches 14, 15, 16, and 17 — this creates a 4-stitch gap between the two wings right on top of the back).
- Right Wing (in Stitch 18 FLO): Drop Yellow. Join Color C (Warm Cream) in the Front Loop Only (FLO) of Stitch 18 and work
(sl st, ch 2, 4 dc, ch 2, sl st)all into that Front Loop! Fasten off Cream and knot the two Cream tails together inside the body. - Pick up Color A (Yellow). Insert your hook into the unworked Back Loop Only (BLO) of Stitch 18 and work 1 sc in Yellow.
- Work 1 sc in both loops of each of the remaining 6 stitches (Stitches 19 to 24). (24 body sc + 2 upright 3D wings!).
-
Round 9: With Color A (Yellow), work 1 sc in each of the 24 body stitches around (working smoothly right behind the wings). (24 sts).
- On the 24th stitch, switch to Color B (Espresso Brown).
Phase 3: Face Placement, Second Stripe & Tail Closure (Rounds 10 – 14)
Stop Here to Add Safety Eyes & Embroider the Face! Before closing up the back of the bee, flatten the body slightly so the two wings sit centered at the very top:
- Insert your Safety Eyes between Rounds 3 and 4 on the front of the face, spaced 7 visible stitches apart. Snap the safety washers firmly on the inside.
- Using 12 inches of Dusty Pink yarn on a tapestry needle, stitch two horizontal
1-stitchblush lines directly beneath the outer corner of each eye. - Using a strand of Espresso Brown yarn, stitch a tiny V-shaped smile centered between the eyes on Round 3.
Now continue with Color B (Espresso Brown):
- Round 10: Work 1 sl st in the first stitch (jogless join), then 1 sc in each of the next 23 stitches around. (24 sts).
- Round 11: Work 1 sc in each stitch around. (24 sts).
- On the 24th stitch, switch back to Color A (Honey Yellow) and cut Color B, tying its end inside the body.
With Color A (Honey Yellow):
- Round 12: Repeat
*1 sc in next 2 sts, inv-dec over next 2 sts*6 times around. (18 sts).- Stuff the bee firmly now! Shape the polyfill into a plump, rounded capsule so the stripes expand evenly without stretching the stitches apart.
- Round 13: Repeat
*1 sc in next st, inv-dec over next 2 sts*6 times around. (12 sts). Add a final pinch of stuffing to the tail end. - Round 14: Work 6
inv-decaround. (6 sts). - Cut Color A leaving an 8-inch tail. Thread the tail onto your tapestry needle, weave through the Front Loops Only of the final 6 stitches, pull tight to cinch the tail closed, and hide the yarn end deep inside the body!
🛠️ Bee Troubleshooting & Customization Clinic
| Common Question / Issue | Why It Happens | Studio Solution |
|---|---|---|
| My wings aren’t centered on top of the back! | Spiral crochet naturally drifts slightly to the right every round. | Before working the Left Wing in Round 8, hold your bee facing you: the two wings should sit on the top 6 stitches directly opposite the bottom color-change seam. If your tension drifted by 1 stitch, simply start the Left Wing in Stitch 12 or 14! |
| Stuffing shows between my yellow and brown rounds | Using a hook that is too large for your yarn thickness. | Drop down 0.5 mm to 1.0 mm in hook size and always use the Invisible Decrease (inv-dec) on Rounds 12–14. |
| How do I turn this into a keychain? | Need a top hanging loop between the wings. | Attach a 6-inch piece of Yellow yarn between the two wings at Round 8, Chain 10, and sl st into the same stitch (or attach a metal split keyring). |
❓ Frequently Asked Questions
What is the best yarn for a chunky plush crochet bee?
For the viral oversized squishy bumblebee, Super Bulky (#6) Chenille Yarn such as Premier Parfait Chunky, Bernat Blanket, or Hobbii Honey Bunny paired with a 6.0 mm (US J-10) hook produces a cloud-soft 6.5-inch bee in under 25 minutes.
Is this bee safe for babies and toddlers under 3?
Plastic snap-in safety eyes can pose a choking hazard for children under 3 years old. If making this bee for a baby shower or nursery gift, skip the plastic eyes and embroider sleepy curved eyelashes using black cotton yarn between Rounds 3 and 4!
🔗 Essential Related Amigurumi & Stitch Tutorials
- 🐋 30-Minute No-Sew Crochet Whale Pattern: Loved the built-in FLO wing trick? Make our matching no-sew pocket whale next!
- 🐰 Easy Crochet Bunny Amigurumi Pattern: Step up to a classic woodland plushie with floppy ears.
- 🐱 Cute Crochet Cat Amigurumi Pattern: Another beginner-friendly animal plushie favorite.
- 🧶 How to Make a Magic Ring (Step-by-Step Photo Tutorial): Master Round 1 of every amigurumi pattern.