Free Printable Plush Bunny Pattern PDF
Get the printer-friendly PDF guide for our Floppy-Eared Plush Bunny pattern! Includes round-by-round stitch counts and assembly instructions.
Amigurumi—the Japanese art of crocheting small stuffed yarn creatures—is one of the most beloved areas of modern crochet craft.
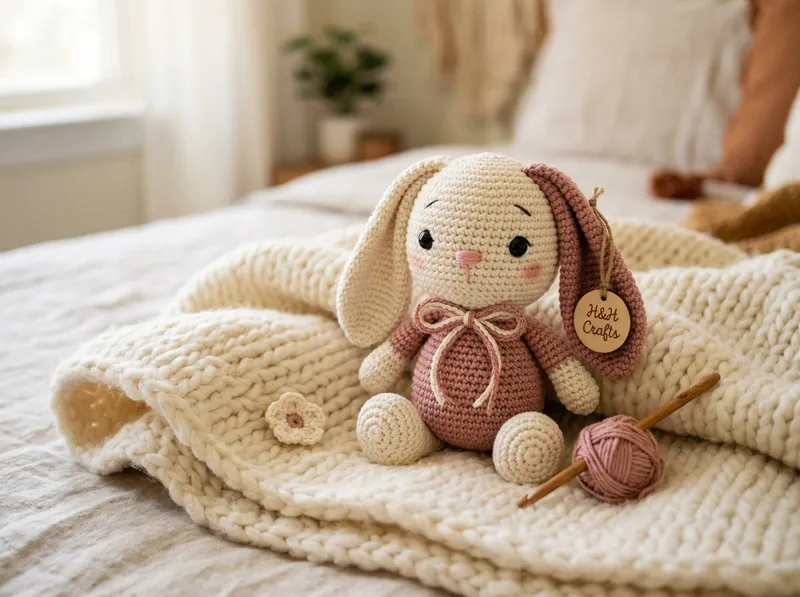
This easy crochet bunny amigurumi pattern is designed specifically for beginners making their very first plushie animal. Featuring long sweet floppy ears, a rounded squishy body, and soft embroidered details, this plush bunny makes an unforgettable handmade gift for baby showers, Easter baskets, or cozy nursery decor.
📋 Pattern Specifications & Overview
| Feature | Specification | Details |
|---|---|---|
| Skill Level | Beginner Amigurumi | Worked in continuous spiral single crochet |
| Finished Height | Approx. 7 inches sitting | Excludes ear length |
| Recommended Yarn | Weight 4 Worsted Cotton or Soft Chenille | Soft pastel shades (Cream & Dusty Rose) |
| Hook Size | 3.5 mm (US E-4) | Ensures dense, non-gap stitches |
| Safety Eyes | 2 x 8 mm Black Plastic Safety Eyes | Positioned between Rounds 7 and 8 |
🧶 Recommended Materials & Tools
- Yarn: ~90 yards of Worsted Weight 4 Cotton or Chenille Yarn (Cream & Dusty Rose).
- Crochet Hook: 3.5 mm (US E-4) ergonomic hook.
- Safety Eyes: 2 x 8 mm black plastic safety eyes with washer backings.
- Stuffing: Hypoallergenic polyester fiberfill stuffing.
- Tools: Tapestry needle, sharp craft scissors, and a locking stitch marker.
[!IMPORTANT] Use a Small Hook Size for Tight Stitches: In amigurumi, always choose a hook 1.0 mm to 1.5 mm smaller than listed on your yarn label! This creates tight, dense stitches that prevent white polyester fiberfill stuffing from peeking through.
🔤 Crochet Abbreviations & Terminology
- ch: Chain stitch
- sc: Single crochet
- inc: Single crochet increase (2 sc in same stitch)
- dec / sc2tog: Invisible decrease (single crochet 2 together)
- sl st: Slip stitch
- st(s): Stitch(es)
- magic ring / circle: Adjustable starting loop
🐰 Step-by-Step Round Instructions
Phase 1: Head & Body (Worked as One Piece)
Note: Work in continuous spiral rounds without joining with a slip stitch. Place a locking stitch marker in the first stitch of every round.
- Round 1: Work 6 sc in a Magic Ring using Cream yarn. (6 sts)
- Round 2: Work 2 sc in each st around (inc x 6). (12 sts)
- Round 3:
[1 sc, inc]repeat 6 times. (18 sts) - Round 4:
[2 sc, inc]repeat 6 times. (24 sts) - Rounds 5 – 10: 1 sc in each st around. (24 sts for 6 rounds)
- Safety Eye Placement: Attach 8 mm safety eyes between Rounds 7 and 8, spaced 5 stitches apart. Snap washer backings securely in place.
- Round 11 (Head Decrease):
[2 sc, dec]repeat 6 times. (18 sts) - Stuff Head: Fill head firmly with polyester fiberfill stuffing.
- Round 12 (Neck Line):
[1 sc, dec]repeat 6 times. (12 sts) - Round 13 (Body Expansion):
[1 sc, inc]repeat 6 times. (18 sts) - Round 14:
[2 sc, inc]repeat 6 times. (24 sts) - Rounds 15 – 18: 1 sc in each st around. (24 sts for 4 rounds)
- Round 19 (Body Decrease):
[2 sc, dec]repeat 6 times. (18 sts) - Stuff Body: Fill body with fiberfill stuffing.
- Round 20:
[1 sc, dec]repeat 6 times. (12 sts) - Round 21:
[dec]repeat 6 times. (6 sts) - Fasten off, leave a 6-inch tail, weave thread through front loops of remaining 6 stitches, pull tight to close, and hide yarn end inside body.
Phase 2: Floppy Ears (Make 2)
In Dusty Rose yarn:
- Round 1: Work 6 sc in Magic Ring. (6 sts)
- Round 2: Work 2 sc in each st around. (12 sts)
- Rounds 3 – 10: 1 sc in each st around. (12 sts for 8 rounds)
- Flatten ears flat without stuffing. Fasten off, leaving a 10-inch tail. Sew ears securely to top sides of head between Rounds 4 and 5.
Phase 3: Cute Arms & Paws (Make 2)
In Cream yarn:
- Round 1: Work 6 sc in Magic Ring. (6 sts)
- Rounds 2 – 6: 1 sc in each st around. (6 sts)
- Flatten top edge flat, stuff bottom paws lightly, and sew to sides of body right below neck line (Round 13).
💡 Pro Tips for Perfect Bunny Plushies
- Locking Stitch Markers Are Essential: Because amigurumi is worked in a continuous spiral, never join rounds with a slip stitch unless noted. Always move your locking stitch marker up to the first stitch of every new round!
- Firm Neck Stuffing: Stuff the neck transition (Rounds 11–13) extra firmly to prevent floppy head syndrome!
- Baby Safety Option: For toys intended for toddlers or infants under 3, embroider sleepy eyes with black embroidery floss instead of using plastic safety eyes.
❓ Frequently Asked Questions
How do I attach safety eyes securely?
Push the post of the safety eye through your crochet fabric from the outside between the recommended rounds. From the inside, press the washer flat down onto the post until it clicks firmly into place before stuffing the head.
What should I do if white stuffing is showing through my stitches?
If stuffing is visible, your hook is too large! Switch to a 0.5mm or 1.0mm smaller hook to tighten your single crochet gauge.
How long does it take to crochet this bunny plushie?
This beginner bunny plushie takes approx. 1.5 to 2.5 hours total, making it a great weekend project!
🔗 Essential Related Crochet Tutorials
- 🐱 Cute Crochet Cat Amigurumi Pattern: Make a sweet kitten plushie companion.
- 🐼 Cute Crochet Panda Amigurumi Pattern: Step-by-step panda bear plushie tutorial.
- 🪄 How to Make a Magic Ring (Magic Circle): Master the ring technique used to start all amigurumi pieces.
- 🧶 How to Make a Single Crochet Stitch: Master the fundamental stitch used throughout amigurumi.