🎄 Welcome to Your Ultimate Handmade Holiday Workshop! 🎄
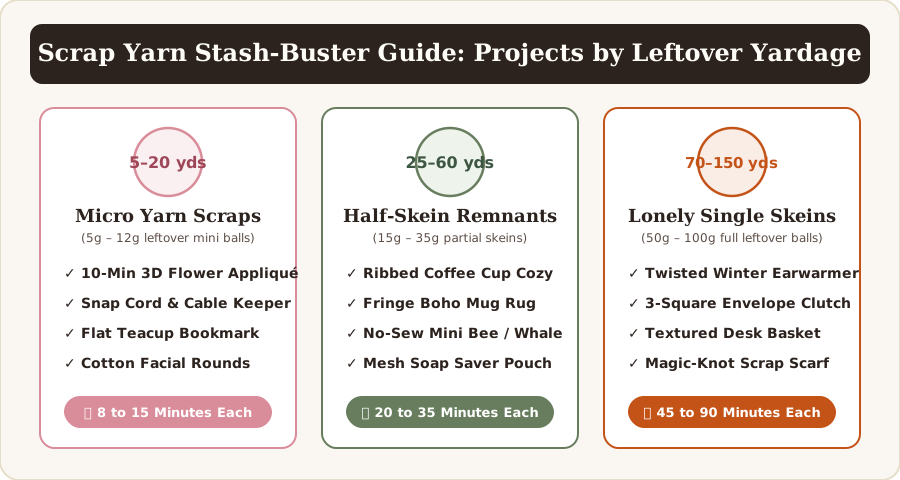
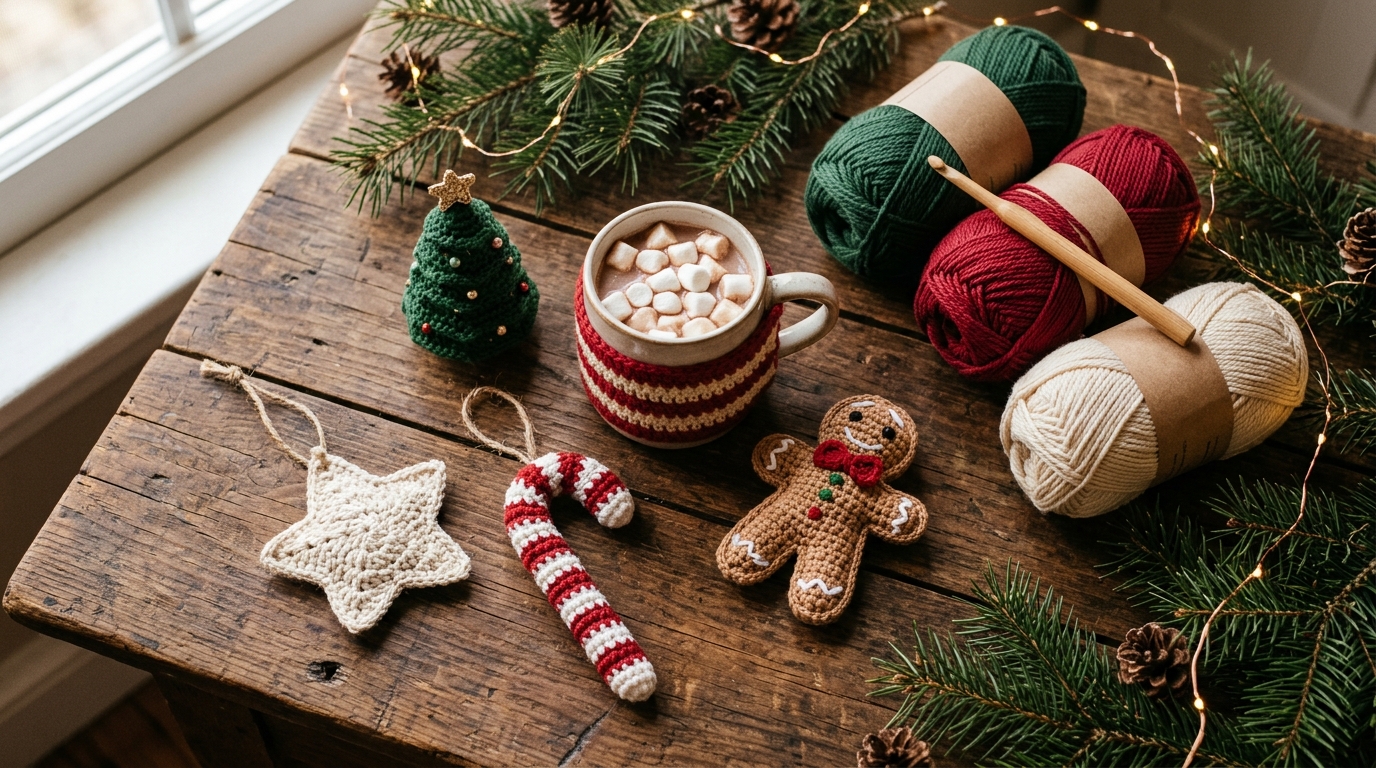
There is nothing quite like the cozy magic of crocheting for Christmas. As the evenings turn frosty and the twinkling lights go up, picking up your crochet hook to stitch handmade ornaments, stocking stuffers, and festive gift toppers is one of the most rewarding ways to celebrate the season. Best of all, handmade Christmas crochet pieces don’t require weeks of complicated lacework—some of the cutest, most cherished holiday keepsakes can be crocheted in under 30 to 60 minutes using basic beginner stitches!
In this comprehensive holiday guide, we are sharing 6 cute and easy Christmas crochet ideas designed specifically for beginners and stash-busters. Even better? We have included the complete, row-by-row and round-by-round written crochet pattern for every single project right on this page, along with custom photography, exact stitch counts, assembly secrets, and festive styling tips!
📋 Quick Comparison: 6 Easy Christmas Crochet Ideas
Whether you have 20 minutes before dinner or a cozy Sunday afternoon by the fireplace, use this quick reference table to pick your first festive project:
| Christmas Project Idea | Skill Level | Time Required | Yarn Weight & Type | Hook Size | Best Used For |
|---|---|---|---|---|---|
| 1. Mini 3D Evergreen Tree | Beginner | 45 mins | Weight 4 Cotton (Green, Brown, Gold) | 3.5 mm (US E-4) | Tiered tree ornament, tiered tray decor, desk buddy |
| 2. Plump Rustic 5-Point Star | Absolute Beginner | 20–25 mins | Weight 4 Cotton (Cream & Mustard Gold) | 4.0 mm (US G-6) | Tree ornaments, holiday bunting garland, gift toppers |
| 3. Striped Candy Cane | Beginner | 25–30 mins | Weight 4 Cotton or Acrylic (Red, Cream, Green) | 3.5 mm (US E-4) | Tree hooks, wreath embellishments, stocking tags |
| 4. Ribbed Peppermint Mug Cozy | Absolute Beginner | 30 mins | Weight 4 Cotton or Wool Blend (Red & Cream) | 5.0 mm (US H-8) | Teacher gifts, secret Santa, hot cocoa bar |
| 5. Sweet Gingerbread Man | Easy Amigurumi | 50–60 mins | Weight 4 Cotton (Cinnamon, Red, White, Green) | 3.5 mm (US E-4) | Tree ornament, scented kitchen charm, kids’ gift |
| 6. Mini Gift Card Stocking | Beginner | 35–40 mins | Weight 4 Worsted (Cranberry Red & Cream) | 4.0 mm (US G-6) | Gift card holder, silverware pocket, advent calendar |
[!TIP] Looking for Delicate Heirloom Lace Snowflakes? If you also want to crochet crisp, starched 6-pointed lace snowflakes in 15 minutes, check out our dedicated Classic Crochet Christmas Snowflake Pattern tutorial!
🧶 Essential Holiday Yarn Palette & Tool Checklist
Before diving into the patterns below, gather a small holiday craft basket. All six projects are designed to work seamlessly with Medium Weight #4 (Worsted / Aran) yarn so you can mix and match the same yarn skeins across every single pattern!
Recommended Holiday Color Palette
- Forest Pine Green: ~60 yards (for the Mini Evergreen Tree, Candy Cane bow, and Gingerbread buttons).
- Cranberry / Festive Red: ~85 yards (for the Candy Cane, Peppermint Mug Cozy, Mini Stocking, and Gingerbread bow tie).
- Warm Oatmeal / Cream White: ~90 yards (for the Rustic Star, Candy Cane stripes, Mug Cozy stripes, Stocking cuff, and Gingerbread icing).
- Golden Mustard / Ochre: ~35 yards (for the Rustic Star center and Mini Tree star topper).
- Cinnamon / Warm Ginger Brown: ~45 yards (for the Gingerbread Man and Mini Tree trunk).
Hooks & Notions
- Crochet Hooks:
- 3.5 mm (US E-4): Used for stuffed 3D amigurumi shapes (Tree, Candy Cane, Gingerbread Man) so stitches stay tight and stuffing never peeks through.
- 4.0 mm (US G-6): Used for the Plump Star and Mini Stocking for balanced structure and drape.
- 5.0 mm (US H-8): Used for the Ribbed Mug Cozy for stretchy, plush thermal insulation.
- Polyester Fiberfill Stuffing: A small handful for puffing up the Tree, Star, and Gingerbread Man.
- White or Red Pipe Cleaners (Chenille Stems): 2 stems twisted together to give the Candy Cane its bendable hook shape.
- Wooden Buttons & Beads: One 18–20 mm wooden button for the Mug Cozy, plus optional 10 mm wooden beads and natural jute twine for rustic hanging loops.
- Tapestry Needle & Stitch Markers: Essential for working in continuous spiral rounds and weaving in yarn ends cleanly.
🔤 Complete US Crochet Stitch Glossary & Abbreviations
All patterns in this guide are written in Standard US Crochet Terms. If you need a visual refresher on any stitch, click the linked tutorial to see step-by-step photos:
- MR: Magic Ring (adjustable starting circle so there is no gap in the center)
- ch: Chain stitch
- sl st: Slip stitch (insert hook, yarn over, pull through both stitch and loop on hook)
- sc: Single crochet
- hdc: Half double crochet
- dc: Double crochet
- tr: Treble (triple) crochet
- inc: Increase (work 2 stitches into the exact same stitch)
- dec (or inv dec): Invisible single crochet decrease (insert hook into front loop only of next 2 stitches, yarn over, pull through 2 loops, yarn over, pull through remaining 2 loops)
- BLO: Back Loop Only (insert hook only under the back loop of the V at the top of the stitch, leaving the front loop free to create a visible horizontal ridge)
- FLO: Front Loop Only (insert hook only under the front loop of the V closest to you)
- ( … ) × N: Repeat the instructions inside the parentheses $N$ times around the round
- [Total]: The number in brackets at the end of a row or round indicates your exact total stitch count upon completing that step
🌲 1. Mini 3D Evergreen Christmas Tree Ornament
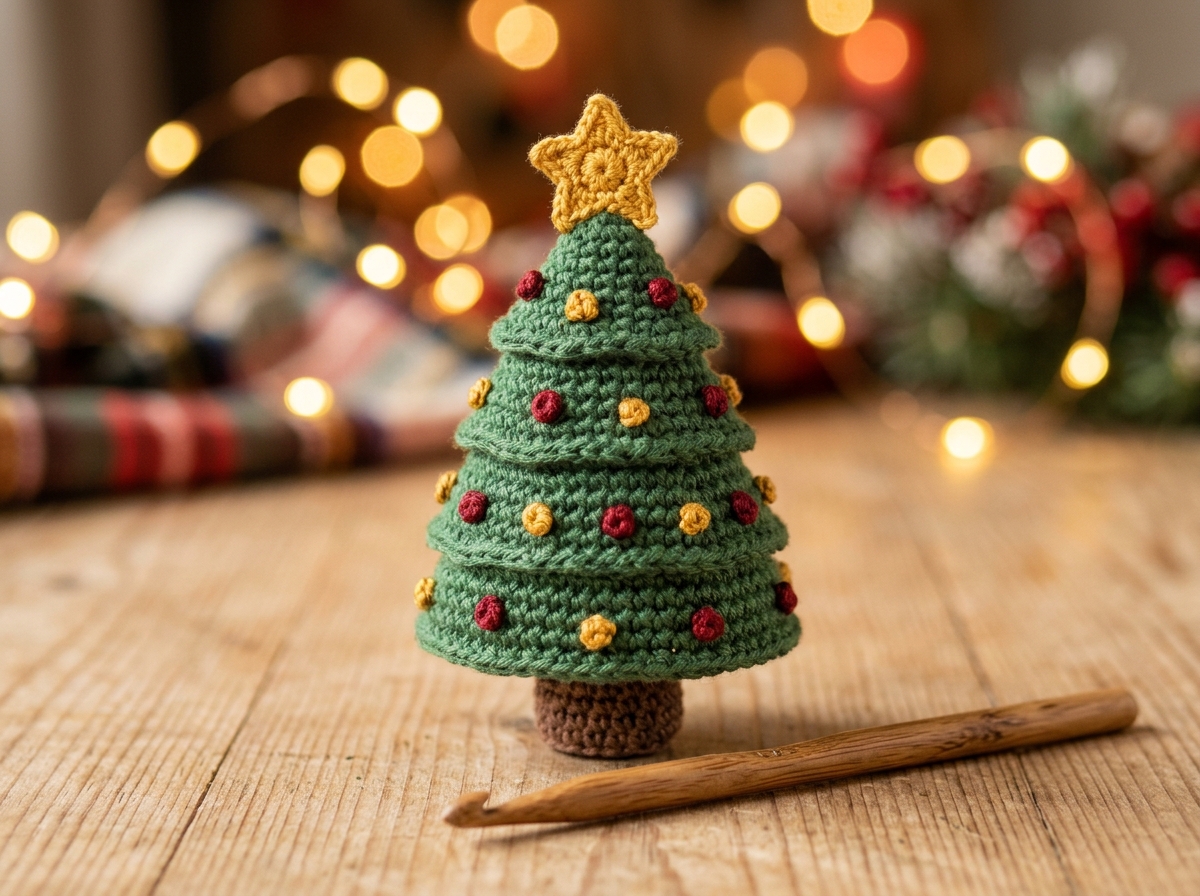
Nothing says Christmas quite like a miniature pine tree! This 3D Tiered Evergreen Tree is worked from the top point down in continuous spiral rounds. By working every third round into the Back Loop Only (BLO), you automatically leave a neat circle of exposed front loops on the outside of the cone—which you then crochet into to create those lush, ruffled evergreen boughs! Topped with a tiny golden star and dotted with French knot berry ornaments, it stands on its own on a desk or hangs proudly on your tree.
Pattern Specifications
- Difficulty: Beginner
- Finished Size: Approx. 4.25 inches (11 cm) tall × 2.75 inches (7 cm) wide at base
- Time Required: 45 minutes
- Hook Size: 3.5 mm (US E-4)
- Yarn: Weight 4 Cotton in Forest Green (25 yds), Cinnamon Brown (6 yds), Mustard Gold (5 yds), and Cranberry Red scraps
Step-by-Step Written Pattern
Part A: The Tree Cone (With Forest Green Yarn)
Note: Work in continuous spiral rounds without joining at the end of each round. Place a stitch marker in the first stitch of every round.
- Round 1: Work 6 sc into a MR. [6 sts]
- Round 2: (1 sc in next st, inc in next st) × 3. [9 sts]
- Round 3: Work 1 sc in each st around. [9 sts]
- Round 4 (BLO — First Tier Ridge): Working in BLO only, (2 sc, inc) × 3. [12 sts]
- Round 5: Working in both loops again, work 1 sc in each st around. [12 sts]
- Round 6: (3 sc, inc) × 3. [15 sts]
- Round 7 (BLO — Second Tier Ridge): Working in BLO only, (4 sc, inc) × 3. [18 sts]
- Round 8: Working in both loops, work 1 sc in each st around. [18 sts]
- Round 9: (5 sc, inc) × 3. [21 sts]
- Round 10 (BLO — Third Tier Ridge): Working in BLO only, (6 sc, inc) × 3. [24 sts]
- Round 11: Working in both loops, work 1 sc in each st around. [24 sts]
- Round 12: (7 sc, inc) × 3. [27 sts]
- Round 13 (BLO — Fourth Tier Ridge): Working in BLO only, (8 sc, inc) × 3. [30 sts]
- Round 14: Working in both loops, work 1 sc in each st around. [30 sts]
- Round 15: (9 sc, inc) × 3. [33 sts]
- Round 16 (BLO — Bottom Base Ridge): Working in BLO only, (10 sc, inc) × 3. [36 sts]
- Do not fasten off yet! Wait until after you add the surface branch ruffles and French knots, or close the base after stuffing.
Part B: Surface Evergreen Branch Ruffles (With Forest Green Yarn)
Hold the tree cone upside down (so the pointed tip faces away from you) and join Forest Green yarn with a slip stitch into the first exposed Front Loop left behind on Round 4:
- Tier 1 Ruffle (on Round 4 front loops): Ch 1, work (1 sc, 1 hdc, 1 sc) in first front loop, sl st in next front loop — repeat all the way around the 9 front loops. Fasten off and weave in ends inside the cone.
- Tier 2 Ruffle (on Round 7 front loops): Join yarn in first front loop of Round 7. Ch 1, work (1 sc, 2 hdc, 1 sc) in next front loop, sl st in next front loop around all 15 front loops. Fasten off.
- Tier 3 Ruffle (on Round 10 front loops): Join yarn in first front loop of Round 10. Ch 1, work (1 sc, 2 hdc, 1 sc) in next front loop, sl st in next front loop around all 21 front loops. Fasten off.
- Tier 4 Ruffle (on Round 13 front loops): Join yarn in first front loop of Round 13. Ch 1, work (1 sc, 2 dc, 1 sc) in next front loop, sl st in next front loop around all 27 front loops. Fasten off.
- Tier 5 Ruffle (on Round 16 outer front loops): Join yarn in first front loop of Round 16. Ch 1, work (1 sc, 2 dc, 1 sc) in next front loop, sl st in next front loop around all 33 front loops. Fasten off.
Part C: Closing the Tree Base & Adding the Trunk
Stuff the green tree cone firmly with polyester fiberfill, shaping it into a neat cone. Resume with your working loop at the bottom of Round 16 (working in BLO so the base sits flat):
- Round 17 (BLO): (4 sc, dec) × 6. [30 sts]
- Round 18: (3 sc, dec) × 6. [24 sts]
- Round 19: (2 sc, dec) × 6. [18 sts]
- Round 20: (1 sc, dec) × 6. [12 sts] (Add a tiny pinch more stuffing if needed so the bottom is flat, not bulging.)
- Round 21: (dec) × 6. [6 sts]. Fasten off and weave the tail through the front loops of the remaining 6 stitches, pulling tight to close.
Tree Trunk (With Cinnamon Brown Yarn):
- Round 1: Work 6 sc into a MR. [6 sts]
- Round 2: (inc) × 6. [12 sts]
- Round 3 (BLO): Working in BLO, work 1 sc in each st around. [12 sts]
- Rounds 4–6 (3 rounds): Working in both loops, work 1 sc in each st around. [12 sts]
- Fasten off, leaving a 10-inch tail. Lightly stuff the trunk and whipstitch it centered onto the flat bottom of your tree!
Part D: Tiny Star Topper & French Knot Baubles
- Mini Star Topper (With Mustard Gold Yarn): Work 5 sc into a MR, pull tight, and join with a sl st to first sc. In each of the 5 stitches around, work: (ch 2, sl st in 2nd ch from hook, sl st into next sc of ring). You now have a tiny 5-pointed star! Fasten off and sew securely to the tip of Round 1.
- Embroidered Baubles: Thread a 15-inch strand of Cranberry Red or Mustard Gold yarn onto your tapestry needle. Bring the needle up between stitches on the tree, wrap the yarn 3 times tightly around the needle tip, and push the needle back down right next to where it came up (holding the wraps taut with your thumb) to form plump French Knot baubles all around the tiers!
⭐ 2. Plump Rustic 5-Point Christmas Star Ornament
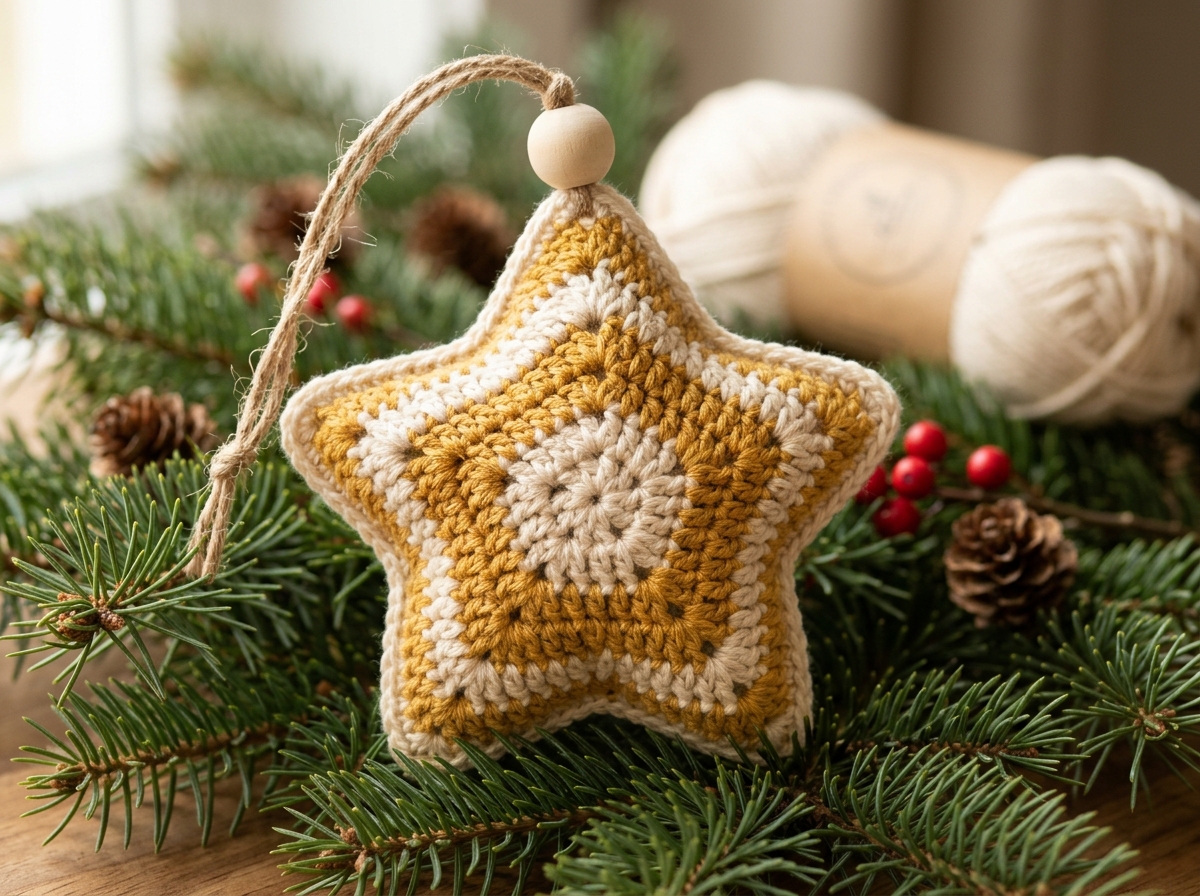
If you want a project that offers pure instant gratification, this Plump Rustic 5-Point Star Ornament is your new holiday best friend. Each star panel is worked in just 3 quick rounds from the center out! You can leave a single flat panel stiffened as a gift topper, or crochet two matching star panels, seam them together around the edges with a contrasting border, and lightly stuff the center for a squishy, boutique-style 3D star ornament.
Pattern Specifications
- Difficulty: Absolute Beginner
- Finished Size: Approx. 4 inches (10 cm) point-to-point
- Time Required: 20–25 minutes
- Hook Size: 4.0 mm (US G-6)
- Yarn: Weight 4 Cotton in Warm Cream (12 yds) and Mustard Gold (12 yds)
- Extras: 8 inches of rustic jute twine and one 10 mm wooden bead
Step-by-Step Written Pattern (Make 2 Matching Panels)
Round 1: The Center Star Core (With Warm Cream Yarn)
- Create a MR, ch 2 (does not count as a stitch).
- Work 10 hdc directly into the magic ring.
- Pull the magic ring tail tightly closed and join with a sl st into the top of the first hdc. [10 hdc]
- Fasten off Warm Cream (or continue with the same color for a solid monochrome star).
Round 2: Expanding the Pentagonal Base (Join Mustard Gold Yarn)
- Join Mustard Gold yarn with a sl st in any stitch from Round 1.
- Ch 1 (does not count as a stitch). Work 2 sc (inc) into the same stitch and into each stitch all the way around.
- Join with a sl st to the first sc. [20 sc]
Round 3: Sculpting the 5 Star Points (With Mustard Gold Yarn)
In this round, each star point spans 4 stitches of Round 2 (4 stitches × 5 points = 20 stitches total).
- Stitch 1 of Point: Work (1 sc, 1 hdc, 1 dc) all into the next stitch.
- Stitch 2 of Point (The Peak): Work (1 dc, 1 tr, ch 2, sl st into top front loop of the tr just made [picot], 1 dc) all into the next stitch.
- Stitch 3 of Point: Work (1 dc, 1 hdc, 1 sc) all into the next stitch.
- Stitch 4 of Point (The Valley): Work 1 sl st into the next stitch.
- Repeat Steps 1–4 four more times around the circle until you have 5 symmetrical star points.
- Fasten off and weave in the inner tails on the wrong side of each panel.
Assembly & 3D Border Seam (With Warm Cream Yarn)
- Place your two star panels wrong-sides together (so the neat right sides face outward on both the front and back), aligning all 5 points.
- Join Warm Cream yarn with a sl st in any “valley” slip stitch between two points, inserting your hook through both panels at the same time.
- Work 1 sc through both layers in each stitch up the side of the first point, work (2 sc) in the ch-2 tip space at the peak of the point, work 1 sc in each stitch down the other side of the point, and work 1 sl st in the valley stitch.
- Repeat around the first 3.5 points, then pause and gently stuff the center and points with a light puff of polyester fiberfill (use the back end of your crochet hook to nudge a tiny bit of stuffing into each star tip).
- Finish single crocheting around the remaining points to seal the star closed. Join with a sl st to the first stitch and fasten off.
- Rustic Hanging Loop: Thread a folded piece of jute twine through one top star point, slide a wooden bead down over both strands to rest snugly against the tip of the star, and tie an overhand knot at the top!
🍬 3. Twisted Red & White Candy Cane Ornament
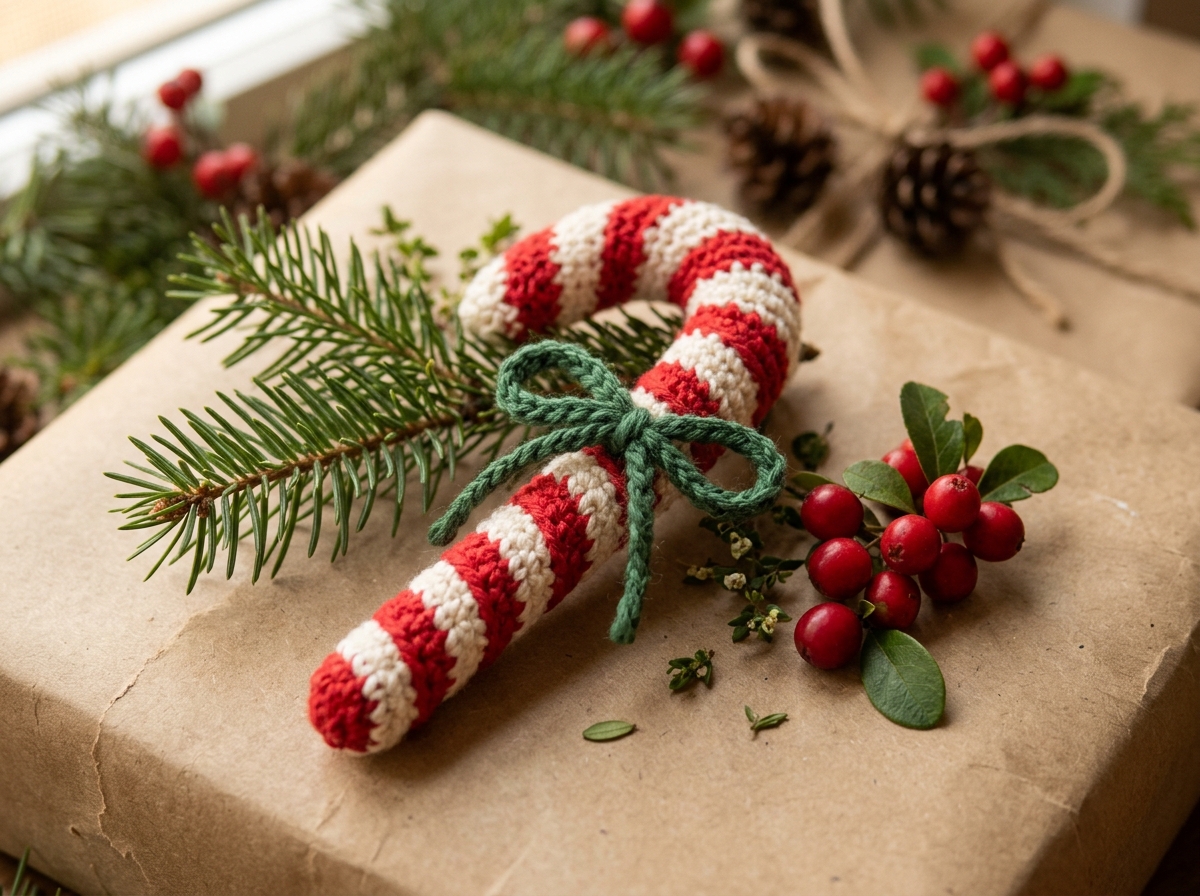
This Twisted Striped Candy Cane looks like it came straight out of a vintage holiday confectionery shop, yet the construction secret is brilliantly simple! Instead of wrestling with complex colorwork in tight mini-tubes, you crochet a simple spiral tube working two strands of yarn in alternating helical stripes (or changing colors every 2 rounds) and slip a folded pipe cleaner inside so you can bend the top into that iconic shepherd’s crook!
Pattern Specifications
- Difficulty: Beginner
- Finished Size: Approx. 5.5 inches (14 cm) tall after bending the hook
- Time Required: 25–30 minutes
- Hook Size: 3.5 mm (US E-4)
- Yarn: Weight 4 Cotton in Cranberry Red (15 yds), Warm Cream (15 yds), and Forest Green (3 yds for the bow)
- Inner Core: Two 12-inch white or red pipe cleaners (chenille stems) twisted together
Step-by-Step Written Pattern
How to Work Clean Helical Candy Cane Stripes
To avoid a jagged vertical “jog” line when switching between Red and Cream every 2 rounds, do not cut your yarn between color changes! Simply carry the unused yarn loosely up the inside of the narrow tube, and on the very last stitch before a color change, pull the new color through the final two loops on your hook to complete the stitch.
Crocheting the Candy Cane Tube
- Round 1 (With Cranberry Red): Work 6 sc into a MR. [6 sts]
- Round 2 (With Cranberry Red): (1 sc in next st, inc in next st) × 3. [9 sts] (Switch to Warm Cream on the final pull-through of the 9th stitch).
- Rounds 3–4 (2 rounds — Warm Cream): Work 1 sc in each st around. [9 sts per round] (Switch to Cranberry Red on the last stitch of Round 4).
- Rounds 5–6 (2 rounds — Cranberry Red): Work 1 sc in each st around. [9 sts]
- Rounds 7–8 (2 rounds — Warm Cream): Work 1 sc in each st around. [9 sts]
- Rounds 9–34 (26 more rounds): Continue alternating 2 rounds of Cranberry Red and 2 rounds of Warm Cream for 13 more stripe pairs until your tube measures approximately 7 inches (18 cm) long.
[!NOTE] Stuffing + Pipe Cleaner Tip: Because the 9-stitch tube is narrow, prepare your pipe cleaner core around Round 18! Take two pipe cleaners, twist them tightly together for extra strength, fold the sharp wire tips inward by 0.5 inches at both ends so they cannot poke through the stitches, and slide the stem into the tube. Wrap tiny wisps of fiberfill around the pipe cleaner as you crochet upward so the cane feels plump yet bendable.
- Round 35 (Closing the End — Cranberry Red): (1 sc in next st, dec) × 3. [6 sts]
- Fasten off, leaving a 6-inch tail. Thread the tail through the front loops of all 6 remaining stitches, pull tight to close the tip, and bury the tail inside the tube.
Shaping & Adding the Forest Green Bow
- Gently bend the top 2.5 inches of the tube over to form the classic candy cane hook.
- With Forest Green yarn and your 3.5 mm hook, chain 42 (approx. 9 inches), fasten off, and tie it into a sweet double bow right below the curve of the candy cane. Secure the center knot of the bow to the cane with a tiny stitch so it never slips off!
☕ 4. Ribbed Peppermint Stripe Mug Cozy
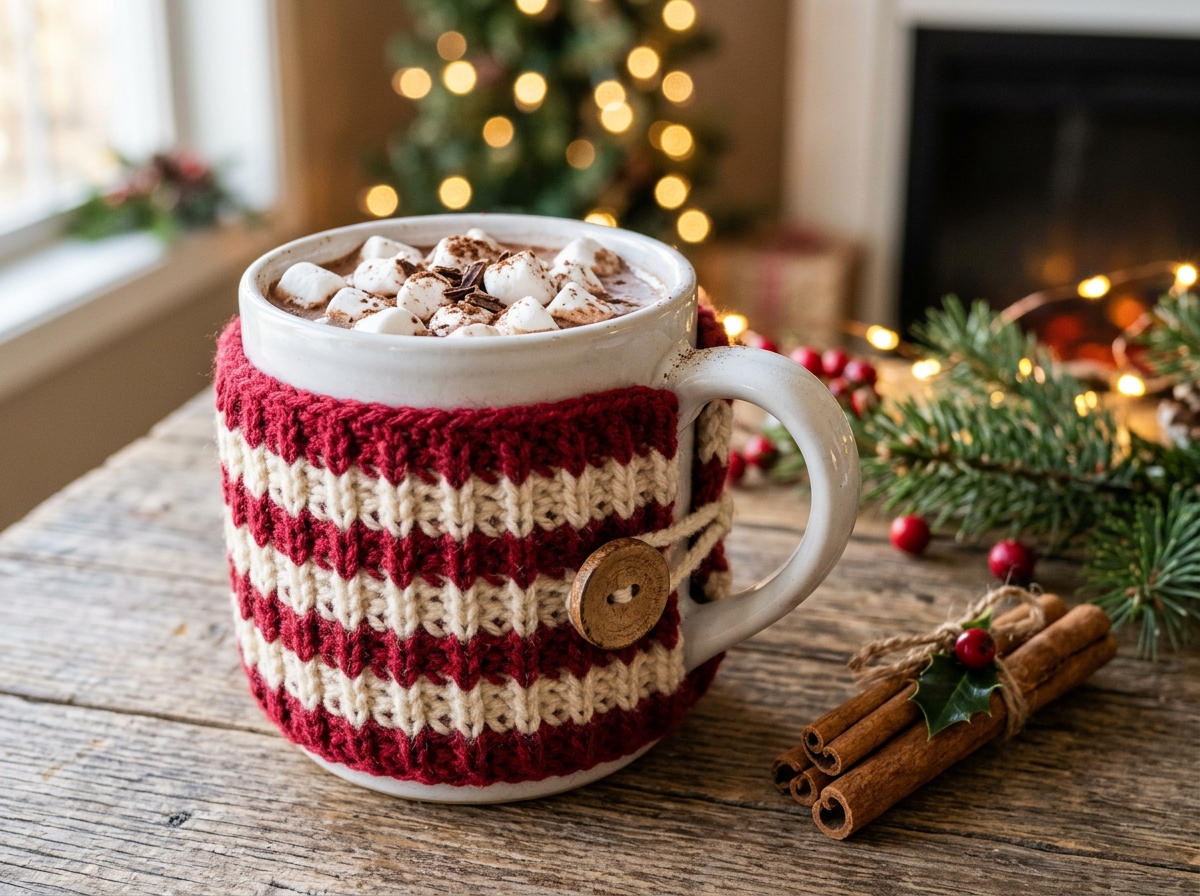
Need a last-minute handmade Christmas gift for teachers, coworkers, neighbors, or coffee lovers? Pair a ceramic mug and a packet of gourmet hot cocoa mix with this Ribbed Peppermint Stripe Mug Cozy! Crocheted flat in back-loop-only half double crochet rows, the vertical ribbing mimics knit fisherman’s rib, hugs any standard 11–15 oz coffee mug snugly, and keeps hands warm and protected.
Pattern Specifications
- Difficulty: Absolute Beginner (Worked completely flat in rows!)
- Finished Size: Approx. 3.25 inches (8.2 cm) tall × 9 inches (23 cm) long (stretches to fit standard mugs)
- Time Required: 30 minutes
- Hook Size: 5.0 mm (US H-8)
- Yarn: Weight 4 Cotton or Cotton-Wool Blend in Cranberry Red (20 yds) and Warm Cream (15 yds)
- Notions: One 18 mm – 20 mm rustic wooden button
Step-by-Step Written Pattern
Construction Note
You will crochet this mug cozy sideways in short rows. Because every row is worked in the Back Loop Only (BLO), the rows create stretchy vertical ribs when wrapped around your mug! To get the horizontal peppermint stripes shown in the photo, we alternate colors within each row using a simple 2-stitch color carry—or for an even faster beginner version, you can work lengthwise in rows! Below is the foolproof Beginner Horizontal Peppermint Stripe method worked lengthwise so you never have to change colors mid-row:
Lengthwise Ribbed Peppermint Stripe Method
- Foundation Chain (With Cranberry Red): Ch 33 (or enough chains to wrap snugly around your mug from one side of the handle to the other, about 8.5 to 9 inches).
- Row 1 (Cranberry Red): Work 1 hdc in the 2nd ch from hook and in each ch across. Ch 1, turn. [32 hdc]
- Row 2 (Cranberry Red — Front Post / Back Loop Ribbing): Working in the 3rd loop (the horizontal bar just below the front loop on the side facing you) or BLO, work 1 hdc in each st across. Join Warm Cream at the end of the row, ch 1, turn. [32 hdc]
- Row 3 (Warm Cream): Working in BLO, work 1 hdc in each st across. Ch 1, turn. [32 hdc]
- Row 4 (Warm Cream): Working in BLO, work 1 hdc in each st across. Switch back to Cranberry Red, ch 1, turn. [32 hdc]
- Row 5 (Cranberry Red): Working in BLO, work 1 hdc in each st across. Ch 1, turn. [32 hdc]
- Row 6 (Cranberry Red): Working in BLO, work 1 hdc in each st across. Switch to Warm Cream, ch 1, turn. [32 hdc]
- Row 7 (Warm Cream): Working in BLO, work 1 hdc in each st across. Ch 1, turn. [32 hdc]
- Row 8 (Warm Cream): Working in BLO, work 1 hdc in each st across. Switch to Cranberry Red, ch 1, turn. [32 hdc]
- Row 9 (Cranberry Red): Working in BLO, work 1 hdc in each st across. Ch 1, turn. [32 hdc]
- Row 10 (Cranberry Red — Top Edge + Button Loop): Working in BLO, work 1 hdc in each of the across 32 stitches. Do not fasten off yet!
Creating the Side Button Loop & Attaching the Button
- At the corner of Row 10, rotate your work 90 degrees to work down the short side edge (the edge that meets the mug handle).
- Work 4 sc evenly down the side edge to reach the exact middle (Row 5).
- Button Loop: Chain 14 (test around your mug handle and wooden button to ensure a snug stretch), and sl st back into the same middle stitch on the edge of the cozy.
- Work 4 sc down the remainder of the side edge to the bottom corner. Fasten off and weave in all tails neatly.
- Sew the Wooden Button: Wrap the cozy around your mug, pull the chain loop under/around the mug handle to the opposite end of the cozy, mark where the loop lands (about 0.75 inches in from the opposite short edge), and sew your wooden button securely in place!
🍪 5. Sweet Spiced Gingerbread Man Plushie Ornament
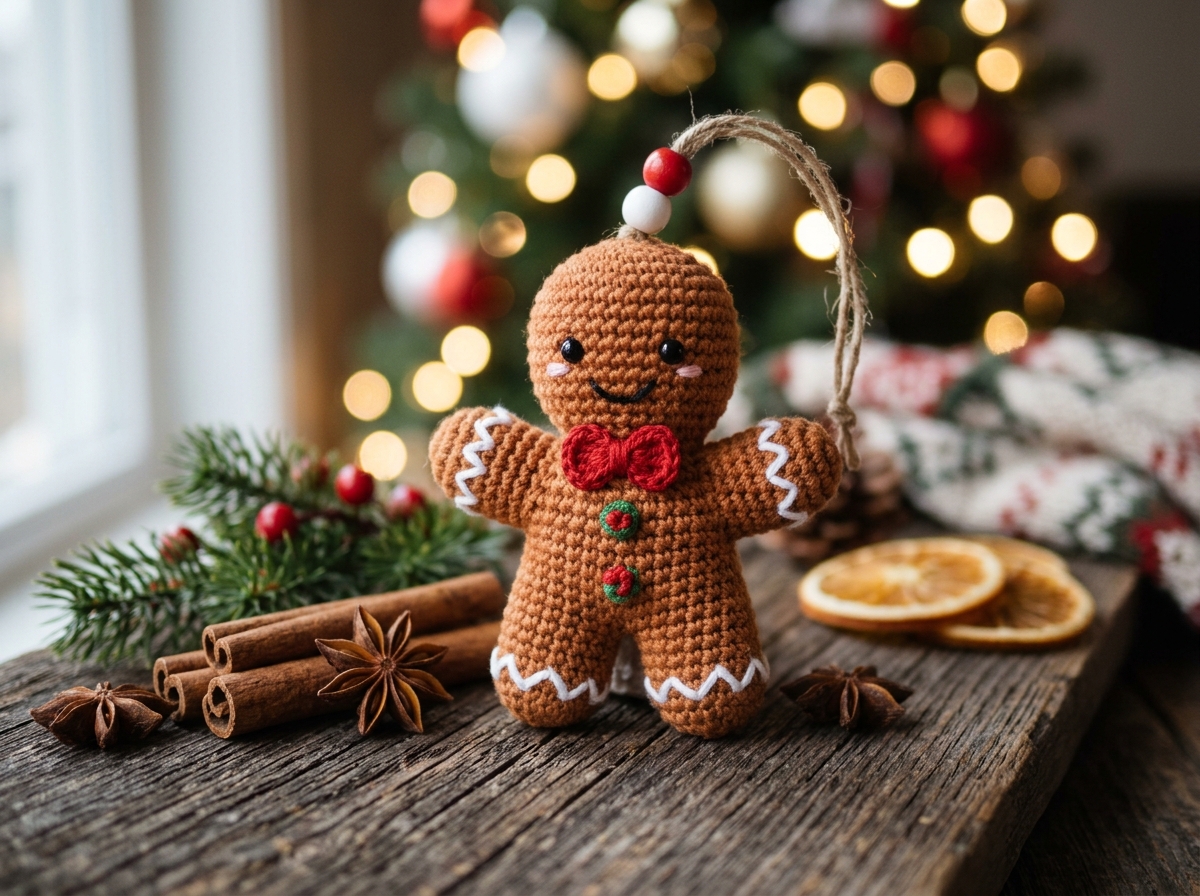
With his rosy embroidered cheeks, dapper red bow tie, French knot gumdrop buttons, and white zig-zag royal icing trim, this Sweet Spiced Gingerbread Man is guaranteed to steal the show on your Christmas tree! Worked as two flat gingerbread panels that are single-crocheted together and lightly stuffed, this clever construction avoids fiddly miniature 4-stitch limb tubes while still giving you a plush, huggable 3D ornament.
Pattern Specifications
- Difficulty: Easy Amigurumi / Confident Beginner
- Finished Size: Approx. 4.75 inches (12 cm) tall × 4 inches (10 cm) wide
- Time Required: 50–60 minutes
- Hook Size: 3.5 mm (US E-4)
- Yarn: Weight 4 Cotton in Cinnamon Brown (35 yds), plus small scraps of Cranberry Red, Warm White, Forest Green, and Soft Pink
- Eyes: Pair of 6 mm black safety eyes (or black embroidery floss French knots)
Step-by-Step Written Pattern (Make 2 Panels: Front & Back)
Phase 1: The Head & Upper Torso (With Cinnamon Brown)
Start at the top of the head in rounds, then continue directly into flat rows for the body and limbs.
- Round 1: Work 6 sc into a MR. [6 sts]
- Round 2: (inc) × 6. [12 sts]
- Round 3: (1 sc, inc) × 6. [18 sts]
- Round 4: (2 sc, inc) × 6. [24 sts]
- Round 5: (3 sc, inc) × 6. [30 sts]. Sl st in next st to finish the circular head. Do not fasten off!
Phase 2: The Neck, Arms & Body (Worked in Flat Rows off the Bottom of the Head)
- Row 6 (Neck): Ch 1, work 1 sc in each of the next 6 stitches along the bottom edge of the head circle. Ch 1, turn. [6 sc]
- Row 7 (Creating the Arm Foundations): Ch 7 (for first arm), turn; starting in 2nd ch from hook, work 6 sc down the chain, work 6 sc across the neck stitches, then ch 7 (for second arm). Turn.
- Row 8 (Across Both Arms & Chest): Starting in 2nd ch from hook on the second arm, work 6 sc down the arm chain, 6 sc across the chest, and 6 sc across the first arm. Ch 1, turn. [18 sc across]
- Rows 9–10 (2 rows — Arm Thickness): Work 1 sc in each of the 18 sts across. Ch 1, turn. [18 sc] (At the end of Row 10, fasten off and re-join yarn in the 7th stitch from the edge so you only work across the center 6 torso stitches, leaving 6 stitches unworked on each side for the arms!)
- Rows 11–14 (4 rows — Waist): Join Cinnamon Brown in the 7th stitch of Row 10. Ch 1, work 1 sc in each of the center 6 torso stitches (leave remaining 6 arm stitches unworked). For Rows 12–14, ch 1, turn, and work inc in first st, 1 sc in middle sts, inc in last st on Row 12 [8 sc] and Row 13 [10 sc], then work 1 sc in each of the 10 sts on Row 14. [10 sc]
Phase 3: Splitting for the Two Legs
- First Leg (Rows 15–19):
- Row 15: Ch 1, turn. Work 1 sc in each of the first 5 stitches only (leave remaining 5 stitches unworked for the second leg). Ch 1, turn. [5 sc]
- Rows 16–18 (3 rows): Work 1 sc in each of the 5 sts across. Ch 1, turn. [5 sc]
- Row 19 (Rounded Foot Tip): Dec over first 2 sts, 1 sc in next st, dec over last 2 sts. [3 sc]. Fasten off.
- Second Leg (Rows 15–19):
- Join Cinnamon Brown in the first unworked stitch at the center crotch of Row 14 (or leave a 1-stitch gap if you want wider-set legs, working 5 sc across the remaining stitches).
- Repeat Rows 15–19 identically for the second leg. Fasten off and weave in tails on the wrong side.
Phase 4: Embroidering the Icing, Face & Bow Tie (On Front Panel Before Seaming!)
It is 10x easier to decorate the Front Panel while the back is still open:
- Eyes & Smile: Insert two 6 mm safety eyes between Rounds 3 and 4 of the head circle (about 4 stitches apart). Add tiny horizontal blush stitches just below the eyes with Soft Pink yarn, and embroider a curved smile with black thread.
- White Zig-Zag Royal Icing: Thread Warm White yarn onto your tapestry needle and backstitch a cute 3-peak zig-zag line across the wrist of each arm and the ankle of each leg.
- Gumdrop Buttons: Embroider two plump circles in the center of the torso using Forest Green and Cranberry Red French knots.
- Mini Red Bow Tie: With Cranberry Red yarn and your 3.5 mm hook, make a MR, work (ch 2, 3 hdc, ch 2, sl st) twice into the ring, pull the ring tight, wrap the long yarn tail 4 times around the center waist of the bow, and sew it right at the neck!
Phase 5: Seaming & Stuffing
- Place the decorated Front Panel and plain Back Panel wrong-sides together.
- Join Cinnamon Brown yarn with a sl st at the side of the neck and work 1 sc through both layers evenly all the way around the head, arms, waist, and legs—stuffing the head, arms, belly, and legs lightly with fiberfill as you go so he is plump and squishy!
- Join with a sl st to the first stitch, fasten off, and attach a rustic jute twine loop with red and white wooden beads at the top of his head.
🧦 6. Mini Cuffed Christmas Stocking (Gift Card Holder)

Giving a gift card, folded cash, lip balm, or gourmet chocolates for Christmas? Ditch the boring paper envelope and tuck your gift inside this Mini Cuffed Christmas Stocking! Worked from the toe up with a clever short-row contrasting cream heel and a fold-over ribbed cuff, it doubles as a darling tree ornament long after Christmas morning.
Pattern Specifications
- Difficulty: Beginner
- Finished Size: Approx. 4.75 inches (12 cm) tall × 3 inches (7.5 cm) wide at the foot (perfect fit for standard credit-card-sized gift cards!)
- Time Required: 35–40 minutes
- Hook Size: 4.0 mm (US G-6)
- Yarn: Weight 4 Worsted in Cranberry Red (25 yds) and Warm Cream (20 yds)
Step-by-Step Written Pattern
Phase 1: The Contrasting Toe (With Warm Cream Yarn)
- Round 1: Work 6 sc into a MR. [6 sts]
- Round 2: (inc) × 6. [12 sts]
- Round 3: (1 sc, inc) × 6. [18 sts]
- Rounds 4–5 (2 rounds): Work 1 sc in each st around. [18 sts] (Switch to Cranberry Red on the last stitch of Round 5. Fasten off Warm Cream).
Phase 2: The Foot (With Cranberry Red Yarn)
- Rounds 6–10 (5 rounds): Work 1 sc in each st around. [18 sts]
Phase 3: The Short-Row Heel Turn (With Warm Cream Yarn)
Now we shape the 90-degree bend of the stocking heel by working back and forth in short rows over only half of the stitches (9 stitches), leaving the other 9 instep stitches unworked for a moment:
- Join Warm Cream yarn in the next stitch (do not cut Cranberry Red—leave it waiting on the inside!).
- Heel Row 1: Work 1 sc in each of the next 9 stitches. Ch 1, turn. [9 sc]
- Heel Row 2: Work 1 sc in each of the 9 sts. Ch 1, turn. [9 sc]
- Heel Row 3 (Shaping the Heel Cup): Skip the first st, work 1 sc in next 6 sts, dec over last 2 sts. Ch 1, turn. [7 sc]
- Heel Row 4: Skip the first st, work 1 sc in next 4 sts, dec over last 2 sts. Ch 1, turn. [5 sc]
- Heel Row 5 (Closing the Heel): Work 1 sc in each of the 5 heel stitches, then work 2 sc evenly along the side edge of the heel rows down to the instep; Fasten off Warm Cream.
Phase 4: The Stocking Leg / Ankle (Resume with Cranberry Red Yarn)
- Pick up your waiting Cranberry Red loop at the corner of the instep.
- Round 11 (Re-establishing the Round): Work 1 sc in each of the 9 unworked front instep stitches, work 2 sc up the side edge of the cream heel, work 1 sc in each of the 5 heel stitches, and work 2 sc down the other side edge of the cream heel. [18 sts total around]
- Rounds 12–19 (8 rounds): Work 1 sc in each of the 18 sts around in a continuous spiral until the leg measures about 2.5 inches above the heel. Sl st in next st and fasten off Cranberry Red.
Phase 5: The Fold-Over Ribbed Cuff & Hanging Loop (With Warm Cream Yarn)
- Join Warm Cream yarn in the back seam stitch of Round 19.
- Chain 7 (this sets the height of the folded cuff).
- Rib Row 1: Starting in the 2nd ch from hook, work 1 sc in each of the 6 chains back down toward the stocking rim, then sl st into the next 2 stitches of the red stocking rim. Turn. [6 sc]
- Rib Row 2: Skip the 2 slip stitches on the rim; working in BLO, work 1 sc in each of the 6 cuff stitches upward. Ch 1, turn. [6 sc]
- Rib Row 3: Working in BLO, work 1 sc in each of the 6 cuff stitches back down to the rim, then sl st into the next 2 stitches of the red stocking rim. Turn.
- Repeat Rib Rows 2 & 3 all the way around the 18 stitches of the stocking rim (18 rim stitches = 9 rib pairs).
- Hold the first rib row and last rib row together and slip stitch seam the 6 cuff stitches together.
- Hanging Loop: Before fastening off, chain 16, join with a sl st to the base of the seam to form a sturdy hanging loop, fasten off, weave in ends, and fold the plush ribbed cuff down over the top of the stocking!
🎁 5 Creative Ways to Style & Gift Your Christmas Crochet Makes
Once you have crocheted a basketful of trees, stars, candy canes, and stockings, here are five unforgettable ways to put them to work this holiday season:
- Create a Nordic Holiday Mantel Garland: Crochet 5 Plump Rustic Stars and 4 Mini Evergreen Trees, then thread them alternatingly along a 6-foot strand of natural jute twine interspersed with 15 mm wooden beads. Drape it across your fireplace mantel, headboard, or entryway mirror!
- Elevate Your Brown-Paper Gift Wrapping: Skip disposable plastic bows! Wrap presents in simple brown kraft paper, tie them up with red-and-white baker’s twine, and tuck a handmade Crochet Candy Cane or Plump Star Ornament into the bow alongside a fresh sprig of rosemary or pine.
- Festive Holiday Place Settings: Place a Mini Cuffed Stocking on top of each dinner napkin at your Christmas table with a candy cane, rosemary sprig, and a handwritten name card tucked inside.
- Scented Cinnamon Ornaments: When stuffing your Sweet Gingerbread Man or Mini Evergreen Tree, tuck a pinch of crushed cinnamon stick or a cotton ball with 2 drops of pine or clove essential oil right into the center of the fiberfill so your ornaments smell like a holiday bakery!
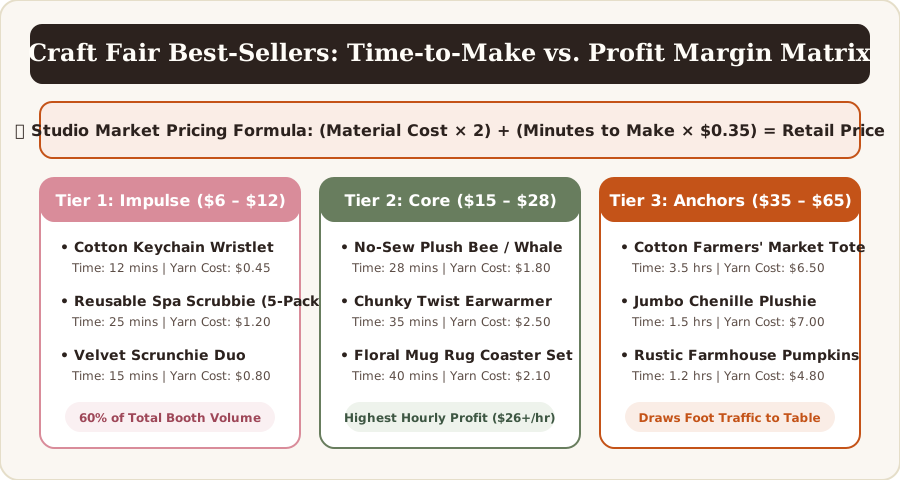
- High-Margin Holiday Craft Fair Bundles: Selling at winter markets? Package a Ribbed Peppermint Mug Cozy around a $1 ceramic mug, or box a trio of ornaments (1 Tree + 1 Star + 1 Candy Cane) in a kraft window box with shredded crinkle paper for an irresistible impulse gift set.
❓ Frequently Asked Questions About Christmas Crochet
What is the best yarn for Christmas crochet ornaments?
100% Worsted Weight (#4) Combed Cotton or Mercerized Cotton is the best choice for Christmas ornaments like mini trees, stars, and gingerbread men. Unlike fuzzy acrylics that can pill when packed away in holiday storage bins, cotton yarn provides crisp stitch definition, holds 3D shapes firmly, and stays looking brand-new for decades.
How can I make these Christmas crochet patterns larger or smaller?
You don’t need to change a single stitch count! To make miniature micro-ornaments (for tabletop trees or earrings), follow the exact same patterns using Sport Weight (#2) or DK (#3) yarn with a 2.5 mm to 3.0 mm hook. To make jumbo plush pillows or mantel decor, use Super Bulky (#6) Chenille / Velvet yarn with a 6.5 mm to 8.0 mm hook!
Which Christmas crochet project is fastest for bulk gifting?
The Plump Rustic 5-Point Star (20 minutes) and the Ribbed Peppermint Mug Cozy (30 minutes) are the fastest patterns on this list. You can easily batch-crochet half a dozen in a single evening while watching Christmas movies!
How should I store handmade crochet ornaments after Christmas?
Store your crochet ornaments in a breathable cotton drawstring bag or a cardboard ornament box lined with acid-free tissue paper in a cool, dry closet. Toss a cedar block or dried lavender sachet into the box to keep everything fresh until next December.
🔗 More Festive & Beginner Crochet Patterns You’ll Love
Ready to keep your hook flying this winter? Explore these popular step-by-step tutorials and patterns on Evercrochet:
- ❄️ Classic Crochet Christmas Snowflake Pattern: Learn how to crochet and stiffen heirloom 6-pointed lace snowflakes in 15–20 minutes.
- 🧣 Evermore Plaid Blanket Crochet Pattern: Stitch a showstopping tartan plaid fireside throw blanket for winter nights.
- 🧥 Evergreen Yoke Sweater Crochet Pattern: Crochet a cozy nordic-inspired winter pullover sweater.
- 🎁 5 Cute & Thoughtful Handmade Crochet Gift Ideas: Discover more year-round handmade gift ideas with free printable PDFs.
- 🪄 How to Make a Magic Ring (Step-by-Step Photo Guide): Master the adjustable starting loop used in our Mini Tree, Star, Candy Cane, Gingerbread Man, and Stocking patterns!